
Mitered Tile Edges: The Beautiful Detail That Changes a Room.

How to choose tile edges, compare porcelain and quartz backsplashes, and mix materials with confidence.
By Trish Whitsell | Beautifully Done Interior Design
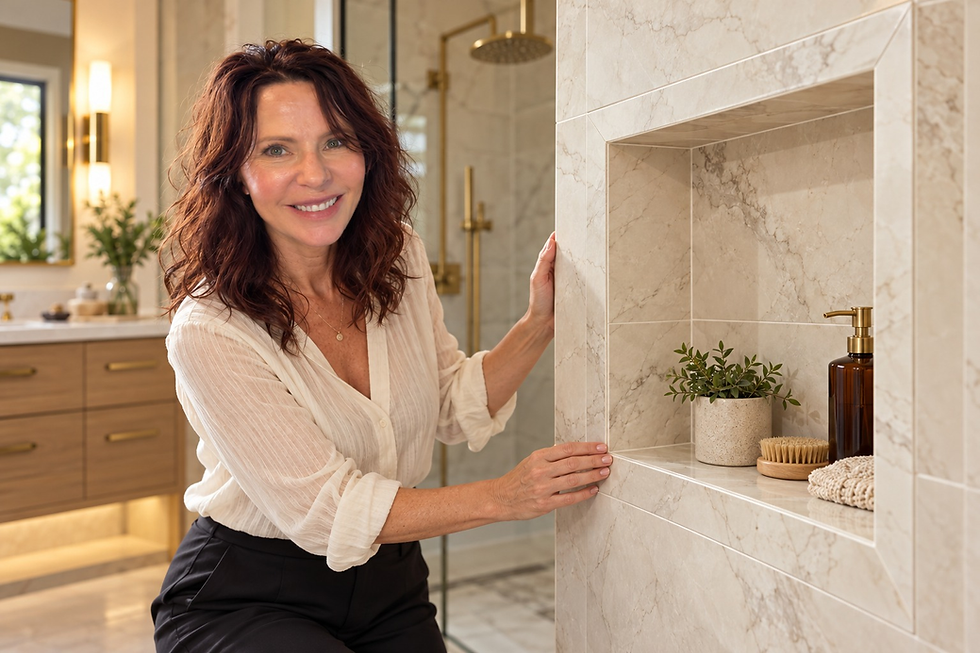
Some of the most beautiful design decisions are the ones you barely notice. You simply walk into a room and feel that everything belongs.
A tile edge is one of those decisions. The corner of a shower niche, the end of a kitchen backsplash, or the return on a tiled wall can either complete the design or interrupt it. Mitered tile edges can create a particularly elegant finish, allowing the material to turn a corner without an obvious border.
But beautiful does not mean best for every situation. The right edge depends on the tile, the installer, the architecture, and how the space will be used. The same thoughtful approach applies when choosing between porcelain tile and carrying quartz countertops up the wall as a backsplash.
What are mitered tile edges?
At a typical square outside corner, the edges of two pieces are cut at complementary angles, usually about 45 degrees, so their faces meet around the corner. Instead of seeing an unfinished tile body or a separate trim strip, you see the surface appear to continue onto the next plane. Porcelain slab fabrication guides illustrate this technique, although the exact edge detail must follow the selected product's requirements. [1]
The effect can be especially lovely around shower niches, wall returns, benches, and other architectural features. With a stone-look tile, thoughtful placement can carry a vein around the corner. That continuity must be planned; it does not happen automatically because the cuts are mitered.
Think of the difference between wrapping a gift with a pattern that lines up at the fold and wrapping it without considering where the pattern lands. Both cover the box. One feels more considered.
Why I love the look—and where I would be cautious
My design preference is to use a miter when the material itself should be the focus. A large porcelain surface can feel calm and sculptural when a separate border would draw attention away from its shape.
There is a tradeoff. Tile edges can be brittle, and creating a thin corner makes workmanship and edge protection especially important. A nearly invisible seam is still a seam; it should not be confused with a joint-free or chip-proof installation. Schluter's guidance emphasizes protecting exposed tile edges, while porcelain fabrication guides call for product-specific bonding and support.
Before approving a miter, I would ask to see a finished corner sample made from the actual tile. Check the edge for small chips, an overly sharp point, uneven alignment, and a noticeable line where the surface pattern ends. A glazed porcelain tile may have a body color that differs from its face. A color-body tile may reduce contrast, but that does not mean its printed pattern runs through the entire thickness.
The installer should determine the suitable edge easing, joint treatment, support, and bonding system. A fabrication adhesive used for an approved slab assembly is not permission to rigidly fill every corner in a tiled room. Tile installations need movement accommodation at changes of plane and where materials meet.
Mitered edges versus other tile finishes

Edge finish | The design effect | What to consider |
Mitered corner | A continuous, architectural appearance | Precise fabrication, visible seam quality, chip exposure, and added labor. |
Metal or color-coated profile | A slim defined line; can blend in or echo hardware | Select a profile sized for the installation and suitable for its environment. [2] |
Coordinating bullnose | A softer rounded finish | Confirm matching pieces are available before selecting the field tile. [3] |
Pencil liner or decorative molding | A deliberate frame, often suited to classic detailing | Check scale, thickness, corner layout, and how much attention the border deserves. |
Solid stone or quartz cap/return | A contrasting or coordinated architectural element | Resolve thickness, overhang, seams, support, and wet-area detailing. |
Approved finished square/eased edge | A simple exposed edge where the material permits it | Inspect the actual body color and finish; many glazed cut edges are unsuitable for exposure. |
These are the main practical alternatives, not a ranking from inexpensive to luxurious. A beautiful bullnose can belong in an English cottage bathroom. A restrained metal profile can be exactly right in a contemporary shower. A decorative liner may give a traditional backsplash the finish it needs.
An unfinished butt corner with a visible raw cut edge is a different matter: it often looks unresolved unless the product and design specifically support that exposure. Grout or caulk should not be treated as a substitute for an appropriate exposed-edge finish.
A miter is an outside-corner treatment. It does not solve every place tile ends against a painted wall, cabinet, countertop, or window. Those transitions need their own details.
Porcelain tile versus carrying quartz up the backsplash
First, a helpful clarification: engineered quartz and natural quartzite are different materials. Taj Mahal quartzite is natural stone; advice for a manufactured quartz surface should not automatically be applied to it.

Porcelain: texture, layout, and flexibility
Porcelain can bring stone looks, quiet solids, and a broad range of sizes and finishes to a backsplash. Its very low water absorption makes it useful in moisture-prone spaces; Daltile highlights this property in its porcelain guidance.
From a design perspective, tile lets us work with rhythm. A stacked layout feels different from a running bond. A large format creates a different visual pace than a small rectangle. Grout can quietly blend in or deliberately emphasize the pattern.
Porcelain tile also introduces joints. Fewer joints in a large-format layout can simplify the visual field, but large tiles and porcelain panels require their own handling, substrate preparation, and installation expertise. A porcelain slab backsplash is not the same installation as a conventional tile backsplash.
For a cooking wall, evaluate the entire assembly: the chosen tile, setting materials, substrate, appliance clearances, and the manufacturer's instructions. A porcelain label alone does not approve every installation.
Quartz: continuity and fewer field joints
Extending quartz from the countertop into a full-height backsplash can make the kitchen feel beautifully connected. It also removes the repeated field grout lines of a tile installation, although slab seams and perimeter joints may still be necessary. Cambria offers thinner quartz slabs intended for applications including backsplashes.
Quartz is nonporous and generally does not require sealing; follow the chosen brand's care instructions. That makes everyday cleaning appealing. It does not make the surface indestructible or heatproof. Cambria cautions that direct or sustained heating and rapid temperature changes can damage its surfaces.
My practical takeaway: confirm the exact quartz product's suitability behind the exact range or cooktop before committing to the design. Have the fabricator check both the surface and appliance manufacturers' requirements. There is no single clearance measurement that I would apply to every brand and appliance.
A full-height slab also deserves a fabrication plan. Ask where seams will fall, how veining will relate to the counter, how outlets will be cut, and where the wall treatment will stop. Review the full slab when possible; a small sample cannot show every vein or variation.
Neither porcelain nor quartz is automatically the less expensive choice. Compare installed quotes for the same scope, including fabrication, edge finishing, wall preparation, cutouts, waste, and installation.
How to mix quartz, porcelain, and other tile successfully

These are my design recommendations rather than technical installation rules. Beautiful combinations usually have a clear relationship—and enough restraint to let each material do its job.
1. Give one surface the leading role
If the quartz has strong sweeping veins, pair it with a quieter backsplash or nearby tile. If the tile has an expressive handmade appearance or lively pattern, a quieter countertop gives it room to shine. Two bold materials can work together, but they need deliberate control of color, scale, and placement.
2. Match undertones, not just the word “white”
Warm ivory quartz can make a blue-white tile look unexpectedly cold. Lay the actual samples together with the cabinet finish, grout, and hardware. Look at them upright and flat, in daylight and under the planned kitchen lighting. Compare the tile to both the quartz's background and its veining.
3. Change scale or texture before adding another pattern
A softly veined slab can pair beautifully with a matte solid porcelain or a restrained glazed ceramic. Contrast gives the room depth without making every surface compete. Strongly ribbed or deeply textured tile deserves an extra cleaning test in a grease-prone area.
4. Let the architecture decide where materials change
A corner, cabinet run, window, or defined panel gives a material transition a reason to exist. Avoid switching from slab to tile halfway across an uninterrupted wall without a clear compositional purpose.
A slab focal panel with tile on adjacent walls can work when the borders, proportions, thicknesses, and appliance requirements are resolved together. Likewise, a short quartz upstand with tile above can work, but it adds another horizontal line. Decide whether that line helps the room before building it.
5. Plan thickness, grout, and movement joints
Quartz, porcelain, ceramic, and glass do not necessarily finish at the same depth. Resolve backing, transitions, edge profiles, and outlet depth before installation. Different tile materials may also require different compatible setting products.
Grout is part of the palette. A close color match can quiet a tile layout; a contrasting color makes its geometry more visible. Where tile meets the countertop or turns a corner, the installer must preserve the required movement accommodation rather than treating every line as an ordinary grout joint.
Three combinations I would consider
Warm and welcoming: softly veined cream quartz countertops, ivory porcelain backsplash tile, natural oak cabinetry, and brushed brass. Keep the grout close to the tile color for a gentle background.
Quiet and architectural: a full-height quartz backsplash, a matte limestone-look porcelain floor in a related undertone, and simple cabinetry. Let the slab carry the visual movement.
Collected and personal: understated warm white quartz, muted sage glazed ceramic backsplash tile, and a calm porcelain floor. Repeat the sage elsewhere sparingly so the kitchen feels connected to the home.
Questions to ask before ordering
What will every exposed edge and material transition look like?
Can I see a completed corner mock-up using my selected tile?
Where will grout lines, slab seams, cutouts, and movement joints fall?
Does the selected surface comply with the cooking appliance's installation requirements?
Have we checked samples with the actual cabinets, lighting, grout, and hardware?
Does the installed quote include the edge detail and all necessary preparation?
Small details make a home feel beautifully finished
The goal is not to use the most complicated edge or the most expensive backsplash. It is to choose details that belong together and can be executed well.
A mitered corner can be stunning. So can a carefully chosen bullnose, a slim profile, or a coordinated slab return. The beauty comes from deciding early enough that the finish looks intentional.
Planning a kitchen or bathroom in Bentonville, Fayetteville, or elsewhere in Northwest Arkansas? Beautifully Done Interior Design can help bring the tile, countertops, lighting, and finishing details into one cohesive plan. Explore beautifullydone.design to start the conversation.
Life is More Fun Beautifully Done



Comments